Next I thought I would write about a topic that, in addition to Home Assistant, also relates a bit to electronics. The idea is to modify a rain gauge so that it can be connected to a Zigbee network. I got the inspiration for this when I read about a similar modification on the Home Assistant community forum, link here https://community.home-assistant.io/t/diy-zigbee-rain-gauge/255379. As a small word of warning, a soldering iron is needed for this modification.
What is needed?
As supplies, you need some rain gauge — mine is this MTX Basic wireless rain gauge (NOTE! this is not a paid advertisement) — and a door and window sensor that can be connected to a Zigbee network, such as Aqara, which I use. This MTX rain gauge works connected to a 433 MHz network, but I didn't have one in use at the cottage, which is why I modified this gauge to work in a Zigbee network.
This MTX rain gauge, like many other gauges on the market, works so that inside the gauge there is a kind of seesaw cup (tipping bucket), which controls the reed switch in the rain gauge as the cup fills with water. In other words, the rainfall is calculated by counting the opening and closing of the reed switch as pulses, in the same way as happens in door and window sensors — when the door closes, the switch closes, and when the door opens, the switch opens. This modified rain gauge works the same way, i.e. we count the pulses it gives and let Home Assistant then handle the conversion to millimeters.
The implementation in a nutshell
First, open the rain gauge and remove the old circuit board so that the wires of the existing reed switch remain visible (in this picture the circuit board has already been removed and the wires connected to the door and window sensor)
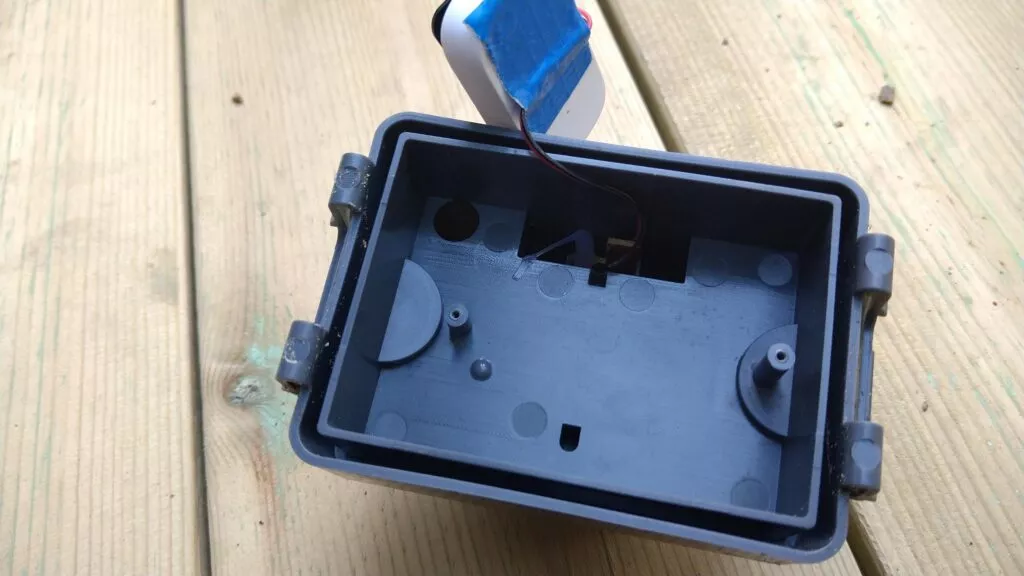
Picture: Rain gauge with the original circuit board removed
Next, open the door and window sensor and remove its reed switch by desoldering it from the circuit board, and solder the wires of the rain gauge's reed switch in its place
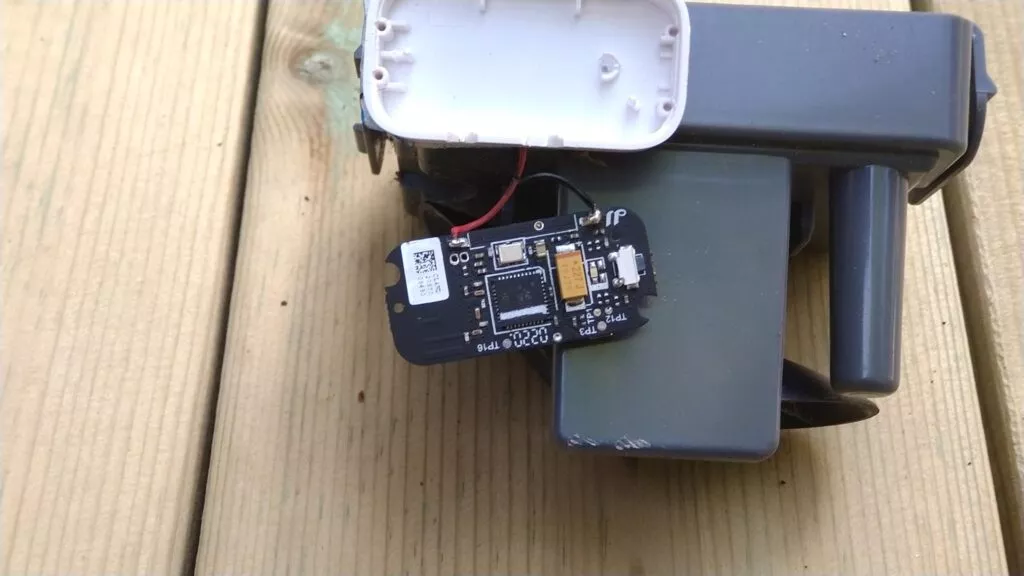
Picture: The rain gauge's reed switch wires soldered in place of the door sensor's reed switch
Below is a picture of the finished implementation before the package is closed
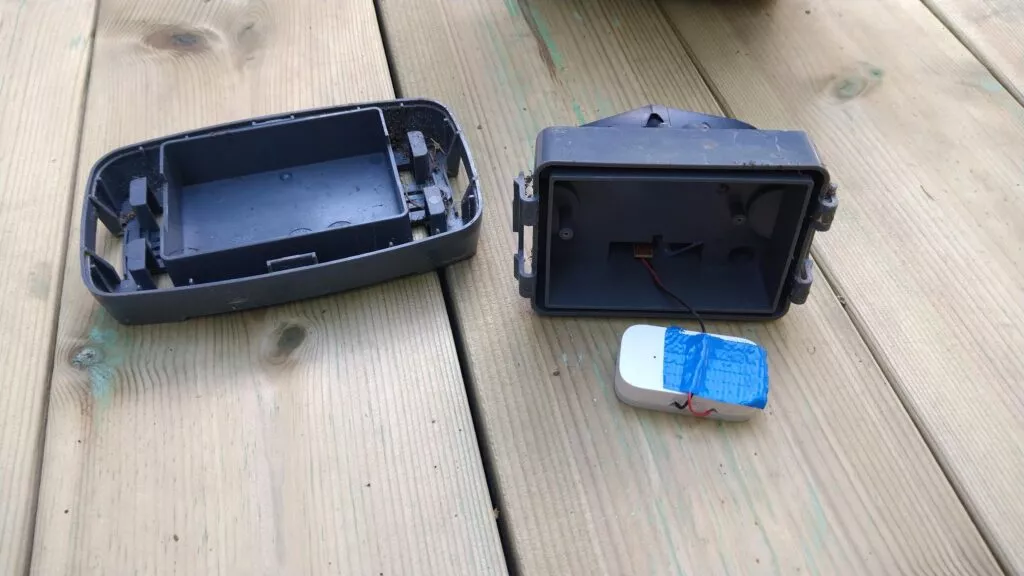
Picture: Rainfall sensor ready
Changes to Home Assistant
Finally, connect the rain gauge to Home Assistant (if not already done) — I add the gauge to Home Assistant via Zigbee2MQTT, so it becomes visible through the MQTT integration. I have named the device "raingauge", so for me the device shows up as binary_sensor.raingauge_contact.
Next, create two new sensors in Home Assistant, i.e. add the lines below to the configuration.yaml file
sensor:
  - platform: history_stats
    name: Raingauge counter
    entity_id: binary_sensor.raingauge_contact #door sensor
    state: 'off'
    type: count
    start: '{{ now().replace(hour=0, minute=0, second=0) }}'
    end: '{{ now() }}'

  - platform: template
    sensors:
      rainfall_today:
        friendly_name: Rainfall today
        unit_of_measurement: mm
        icon_template: mdi:water
        value_template: >-
          {% set count = states('sensor.raingauge_counter') | int %}
          {% set mm_per_pulse = 0.330024 %}
          {% set mm = count * mm_per_pulse %}
          {{ mm|round(1, 'floor') }}
Calibrating the rain gauge
Calibrating the rain gauge can be done as follows (also explained on the community forum) — first measure the surface area of the rain gauge and how many pulses 10 ml of water causes. Calculations below
-
the size of the rain gauge is 17.2 cm x 9.6 cm
-
1 mm of rain in the gauge is then 0.1 x 17.2 x 9.6 = 16.512 ml
-
10 ml of water in the rain gauge causes 5 pulses, i.e. 2 ml / pulse
-
this gives a rainfall per pulse of 16.512 / 10 / 5 = 0.33024 mm / pulse
So with the calculation above we get the total daily rainfall, but if we also want to calculate more precisely e.g. hourly, weekly etc. rainfall amounts, the calculation formulas for these must still be added to the Home Assistant configuration.yaml file — here we can use Home Assistant's utility_meter integration.
utility_meter:
# rainfall per hour
  rainfall_hour:
    source: sensor.rainfall_today
    cycle: hourly
# rainfall per week
  rainfall_week:
    source: sensor.rainfall_today
    cycle: weekly
# rainfall per month
  rainfall_month:
    source: sensor.rainfall_today
    cycle: monthly
# rainfall per year
  rainfall_year:
    source: sensor.rainfall_today
    cycle: yearly
Finally, information about the rainfall amounts can be added to the Home Assistant dashboard, i.e. add an entities card as shown below
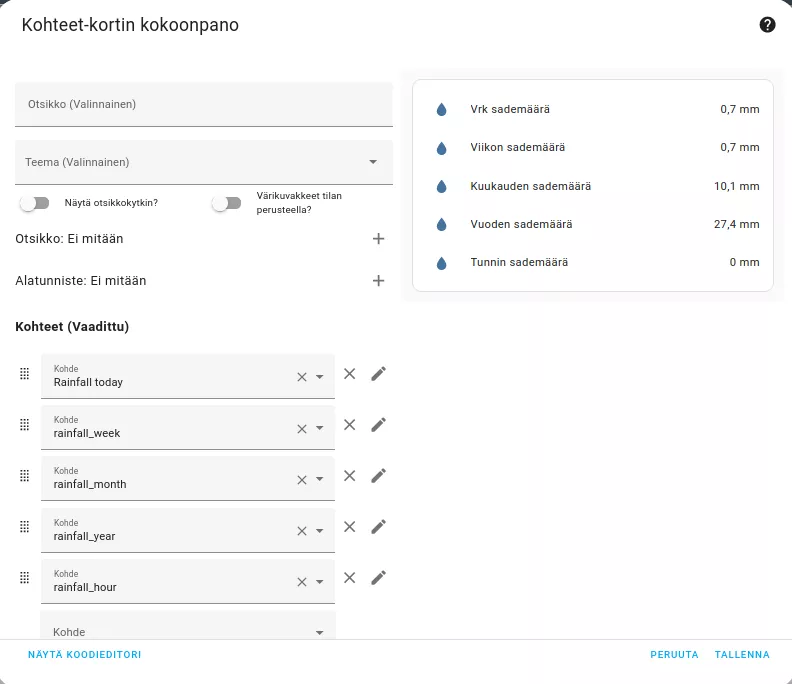
Picture: Home Assistant entities card